Kkakdugi, a beloved Korean side dish, stands apart from other kimchi varieties with its refreshing crunch and subtly sweet and spicy flavor profile. Unlike the fiery heat often associated with kimchi, kkakdugi offers a more balanced, approachable taste, making it a perfect introduction to the world of fermented vegetables. Its key ingredient, the daikon radish, provides a crisp texture that's both satisfying and invigorating, complemented by a simple yet flavorful brine. The vibrant yellow hue of the kimchi adds a visual appeal to any meal.
This unique kimchi is surprisingly easy to make at home, resulting in a homemade version that surpasses store-bought options in both freshness and flavor. Ready to experience the delightful crunch and satisfying taste of homemade kkakdugi? Let's dive into the step-by-step process to create your own batch of this delicious Korean side dish.
Tools Needed
- Knife
- Peeler
- Bowl
- Pot
- Kimchi container
Ingredients
- Winter Radish: 3 kg (approx. 1.5 kg used in video)
- Water: 2 cups
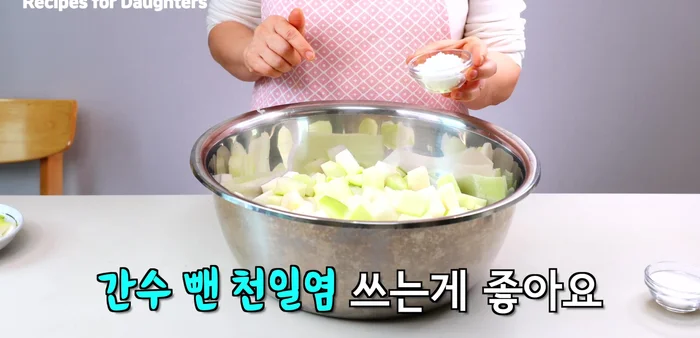
- Sea Salt: 1 large spoonful (adjust to taste)
- White Sugar: 2 large spoons
- Dry Glutinous Rice Flour: 1 cup
- Red Pepper Powder: Less than 1 cup (adjust to spice preference)
- Finely Chopped Onion
- Shrimp Paste
- Minced Garlic
- Minced Ginger
- Green Onion (white part only): 5-20 strands (approx. 1 ho-eum)
Step-by-Step Instructions
Step 1. Prepare the Radish
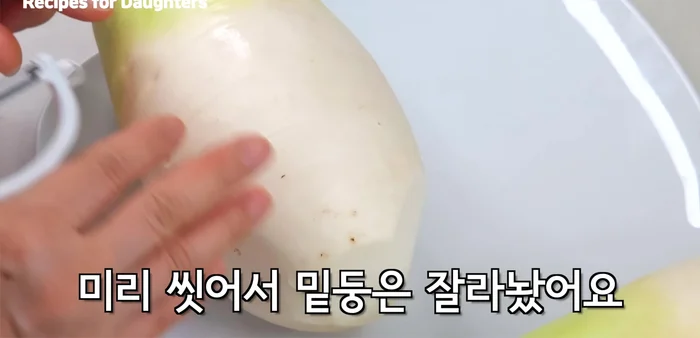
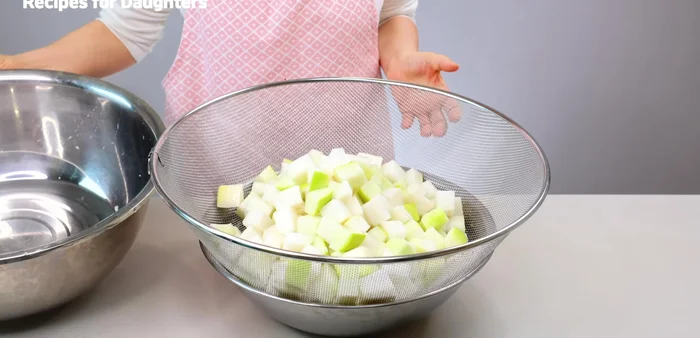
- Wash and clean the radish, peeling off any dirty parts.
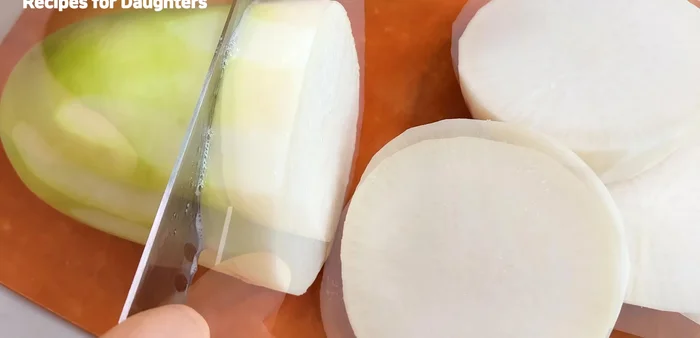
- Cut the radish into 2-2.5 cm cubes.
- Mix the cubed radish with sea salt and white sugar. Let it sit for about an hour, turning it halfway through.
Step 2. Make the Seasoning and Combine
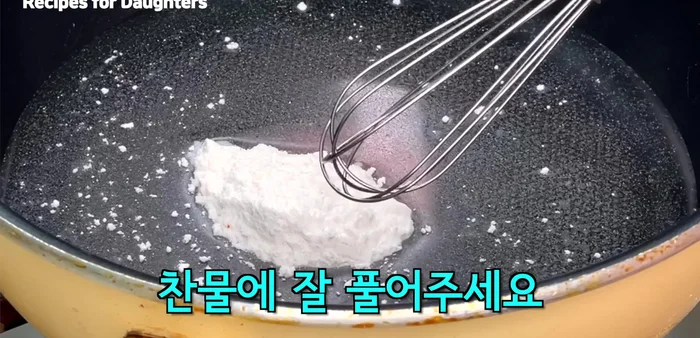
- Mix dry glutinous rice flour with cold water and bring to a boil. Stir occasionally, then let it cool completely.
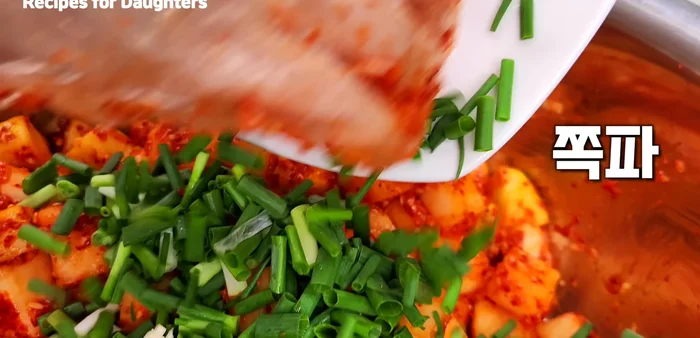
- Finely chop green onion (white part only).
- Drain the water from the radish and add red pepper powder. Mix well and let it sit for 5 minutes.
- Add the chopped onion, shrimp paste, minced garlic, minced ginger, and the cooled glutinous rice porridge. Mix thoroughly.


- Add the chopped green onion and mix well.
- Taste and adjust seasoning with sea salt if needed.

Step 3. Ferment the Kkakdugi
- Pack the Kkakdugi in a kimchi container, placing a weight on top to keep it submerged.

Read more: Easy Korean Cucumber Kimchi (Oi Sobagi) Recipe
Tips
- Use winter radish for best results. It has more moisture and sweetness.
- Adding white sugar enhances the crunch and reduces spiciness.
- Use cold water to dissolve the glutinous rice flour to prevent clumping.
- Only use the white part of the green onion to avoid stickiness.
- Adjust the amount of red pepper powder according to your spice preference.
- Ferment indoors for about two days for best flavor.
Nutrition
- Calories: approximately 200-250
- Fat: 1-2 g
- Carbs: 45-55 g
- Protein: 2-3 g
FAQs
1. How long does kkakdugi last?
Properly stored in the refrigerator, kkakdugi can last for 2-3 weeks. The flavor will develop and mellow over time.
2. Can I adjust the spice level?
Absolutely! You can control the spiciness by adjusting the amount of gochugaru (Korean chili flakes) you use. Start with less and add more to your preference.
Enjoy your freshly made, crisp and tangy kkakdugi! This vibrant kimchi is a delicious addition to any meal, perfect as a side dish or incorporated into your favorite recipes. Now go forth and enjoy the satisfying crunch and unique flavor of your homemade creation!